Friday, 9 September 2016

SQL GROUP BY And HAVING Clause

GROUP BY Clause

The GROUP BY statement is used in conjunction with the aggregate functions to group the result-set by one or more columns.


Example - Suppose you want to check number of orders placed by each customer


Here, above we have 2 tables customer and order and we need to find number of orders by each customer.

Query - select c.name, c.phone from customer c join orders o on c.id = o.custId


Now, To get the count of repeated customers

Query - select c.name, count(o.custid) as totalorders from
             customer c join orders o on c.id =  o.custId
             group by c.name

Multiple columns in Group By

Query - select c.name, c.phone, count(o.custid) as totalorders from
             customer c join orders o on c.id =  o.custId
             group by c.name, c.phone


HAVING Clause
There is always some situation where you need to use aggregate function with WHERE clause. Using aggregate function with WHERE clause is not allowed. So with the help of HAVING clause we can use aggregate function with WHERE clause.

For example as above in GROUP BY clause if we would like to get those records having more than 1 order taht can be achived by using HAVING with WHERE clause.

GROUP BY Query as above to get customer detail and total number of oders placed by them

Query - select c.name, c.phone, count(o.custid) as totalorders from
             customer c join orders o on c.id =  o.custId
             group by c.name, c.phone

Using HAVING clause to get customer having more than 4 orders placed

Query - select c.name, c.phone, count(o.custid) as totalorders from
             customer c join orders o on c.id =  o.custId
             group by c.name, c.phone 
             having count(o.custid) > 4

Same using where clause

Query - select c.name, c.phone, count(o.custid) as totalorders from
             customer c join orders o on c.id =  o.custId
             where c.name = 'tarran'
             group by c.name, c.phone
             having count(o.custid) > 4


Tuesday, 26 July 2016

Window Service

Window service is a service which runs in a background and need no user interaction. It automatically started when computer boots.
Mostly, There is business requirement for long-running scheduled jobs based on some time interval. For example - Sending emails, Reminder messages etc after some time interval or on daily basis. So, Window service is best fit for this system.

To create window service
Add window service in your project


By default it will create following files as in below image in your window service project.


  • Program.cs basically have code to start your service that is Service1.cs.
  • Service1.cs will contain OnStart and OnEnd method of service.


Now we required installer class to install service. To add installer class, click on Service1.cs. It will open a window right click on it and select AddInstaller as in below image.


It will add installer class named PprojectInstaller.cs.


Now on serviceInstaller1 box right click and select properties. You will see property window on right side of screen. It contain basic properties of your service installation. Look at start-type which is manual. It means service will not start automatically after installation. You have to start it manually.

So far, We have 3 files in our window service project :

  • Program.cs, Which contain code to run your Service1.cs file.
  • Service.cs, It contain method OnStart and OnEnd which will trigger when service start and end.
  • ProjectInstaller.cs, Which is your installer class and used to install service.
Now lets add a another class to logging triggers named Liberary.cs

Liberary.cs

 public static class Liberary
    {       
        public static void WriteLog(String msg)
        {
            StreamWriter sw = null;
            try
            {
                sw = new StreamWriter(AppDomain.CurrentDomain.BaseDirectory + "\\LogFile.txt", true);
                sw.WriteLine(DateTime.Now.ToString() + ": " + msg);
                sw.Flush();
                sw.Close();
            }
            catch { }
        }              
    }


Service1.cs 

    public partial classService1 : ServiceBase
    {       
        public Service1()
        {
            InitializeComponent();     
        }

        protected override void OnStart(string[] args)
        {
            Liberary.WriteLog("Service started");
            Job();
        }

        public void Job()
        {
            Liberary.WriteLog(DateTime.Now + " : Test");
            double TimerInterVal = (double)30000; //After 30 seconds       
            System.Timers.Timer myTimer = new System.Timers.Timer();       
            myTimer.Interval = TimerInterVal;
            myTimer.AutoReset = true;
            myTimer.Elapsed += new System.Timers.ElapsedEventHandler(notify_Elapsed);
            myTimer.Enabled = true;
        }

        void notify_Elapsed(object sender, System.Timers.ElapsedEventArgs e)
        {
            Liberary.WriteLog(DateTime.Now + " : Elapse");
        }

        protected override void OnStop()
        {
            Liberary.WriteLog(DateTime.Now + " : Stop");
        }       
    }

In Service1.cs, We have created a job which will run after every 30 seconds and logged it in a file. Now rebuild project in debugging mode. It will create a exe file in bin > debug folder.

Install window service

To test your window service, we need to install it.

Go to Window > All program > Visual studio 2013 > Visual studio tools > Developer command prompt for VS2013

Now write following command :

InstallUtil.exe "../pathofproject/bin/debud/application.exe"

It will install the service. But remember it will run manually as setup in installer file start-type property. Now open the services app in all program. Here you will find your service and you can start it manually.

To debug window service without installing 
  • Remove program.cs file which was added by default when you created the project.
  • Add following in Service1.cs file.
        public static void Main()
        {
#if DEBUG
            Scheduler ser = new Scheduler();
            ser.OnStart(null);
#else

            ServiceBase.Run(new Scheduler());
#endif
        }


Thursday, 21 July 2016

Form authentication in MVC

Tables
create table UserRole(Id int primary key identity(1,1), Name varchar(20) not null)

select * from UserRole


create table Users(ID int primary key identity(1,1), Email varchar(100), Password varchar(100), RoleId int not null foreign key references UserRole(id))

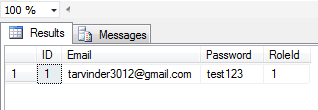
insert into Users values('tarvinder3012@gmail.com', 'test123', 1)

select * from Users


Now, Create MVC empty application

Now, In solution folder add separate project/class library for data source (Entity framework). Create database first approach and provide server detail. It will automatically create classes. Also add connection string in app config file.

You can use same connection string in your mvc project web config.

As we are going to do form authentication so we need to mention it in web config.

  <system.web>
    <compilation debug="true" targetFramework="4.5"/>
    <httpRuntime targetFramework="4.5"/>
    <authentication mode="Forms">      
    </authentication>
  </system.web>

Add controller - Account Controller

using EfModel;
using FormAuthentication.Models;
using System;
using System.Collections.Generic;
using System.Linq;
using System.Web;
using System.Web.Mvc;
using System.Web.Security;

namespace FormAuthentication.Controllers
{
    public class AccountController : Controller
    {
        public ActionResult Index()
        {
            return View();
        }

        [HttpPost]
        [ValidateAntiForgeryToken]
        public ActionResult Index(Login model)
        {
            if (ModelState.IsValid)
            {
               using(TestEntities _context = new TestEntities())
               {
                   User res = _context.Users.Where(p => p.Email == model.UserName && p.Password == model.Password).FirstOrDefault();
                   if (res == null)
                   {
                       ViewBag.Status = "Invalid credentials";
                   }
                   else
                   {
                       Session["User"] = model;
                       FormsAuthentication.SetAuthCookie(res.Email, false);
                       return RedirectToAction("index", "home");
                   }
               }

               return View();
            }
            else
            {
                return new HttpNotFoundResult();
            }
        }

        [HttpGet]
        public ActionResult Logout()
        {
            FormsAuthentication.SignOut();
            Session.Abandon();
            return RedirectToAction("index", "account");
        }       
    }
}

Add view - Index View(Account controller)

@model FormAuthentication.Models.Login
@using System.Web.Mvc.Html

@{
    ViewBag.Title = "Index";
}

<h2>Index</h2>

@using(Html.BeginForm("Index", "Account", FormMethod.Post))
{    
    @Html.AntiForgeryToken();
    
    <label>UserName</label>   
    @Html.TextBoxFor(u => u.UserName, new { placeholder = "Emial" });
    @Html.ValidationMessageFor(u=> u.UserName)
    
    <label>Password</label>    
    @Html.PasswordFor(u => u.Password, new { placeholder = "Password" });
    @Html.ValidationMessageFor(u=>u.Password)
    
    <input type="submit" value="Login" />

    <label>@ViewBag.Status</label>
}

Add controller - Home Controller

using FormAuthentication.Filter;
using System;
using System.Collections.Generic;
using System.Linq;
using System.Web;
using System.Web.Mvc;

namespace FormAuthentication.Controllers
{
    [CheckAuthentication]
    public class HomeController : Controller
    {        
        public ActionResult Index()
        {
            return View();
        }
    }
}

Add view - Index View(Home controller)

@{
    ViewBag.Title = "Index";
}

<h2>Welcome</h2>

<a href="/account/logout">Logout</a>


Authorization filter - It will be use in controller to check user accessing resoureces is authorized. 

Add Class -  CheckAuthentication

using System;
using System.Collections.Generic;
using System.Linq;
using System.Web;
using System.Web.Mvc;
using System.Web.Routing;

namespace FormAuthentication.Filter
{
    public class CheckAuthentication : AuthorizeAttribute
    {
        public override void OnAuthorization(AuthorizationContext filterContext)
        {
            if (HttpContext.Current.User.Identity.IsAuthenticated)
            {
                base.OnAuthorization(filterContext);
            }
            else
            {
                filterContext.Result = new RedirectToRouteResult(new RouteValueDictionary(new{ controller = "account", action = "index" }));
            }
        }
    }
}


Thursday, 30 June 2016

CTE - Common table expression

CTE - Common table expression

It is difficult to write and maintain queries that has number of joins and very complex structure. These queries can made easier to write, read and maintain by the help of CTE.

CTE is common table expression. It is a temporary result set which allow you to define subquery by assigning a alias name and use it further as a temporary table. You can create as many as CTE alias result set and use it to display output.

Example -

select * from(select id, name, class from student) S
where S.class > 6 order by S.id

The query looks bit complex and difficult to understand. But by using CTE. We can create a temporary result set which is easy to understand and maintain. And can used at time to display output.

With T(id, name, class)
As
(
select id, name, class from student
)
select * from T where class > 6

Here you can see above CTE is very simple, easy to understand and maintain.

Syntax -

1) WITH keyword is followed by the CTE name.
2) Column list in parenthesis is optional.
3) Query is written after AS keyword in parenthesis.

A CTE can be used to:
  • Create a recursive query. 
  • Enable grouping by a column that is derived from a scalar subselect, or a function that is either not deterministic or has external access.
  • Reference the resulting table multiple times in the same statement.


CTE - Common table expression

CTE - Common table expression

It is difficult to write and maintain queries that has number of joins and very complex structure. These queries can made easier to write, read and maintain by the help of CTE.

CTE is common table expression. It is a temporary result set which allow you to define subquery by assigning a alias name and use it further as a temporary table. You can create as many as CTE alias result set and use it to display output.

Example -

select * from(select id, name, class from student) S
where S.class > 6 order by S.id

The query looks bit complex and difficult to understand. But by using CTE. We can create a temporary result set which is easy to understand and maintain. And can used at time to display output.

With T(id, name, class)
As
(
select id, name, class from student
)
select * from T where class > 6

Here you can see above CTE is very simple, easy to understand and maintain.

Syntax -

1) WITH keyword is followed by the CTE name.
2) Column list in parenthesis is optional.
3) Query is written after AS keyword in parenthesis.

Friday, 17 June 2016

Save image in database and render image from database

Firstly, We can save image in database as a byte array. Here, We will create a webapi which accept image as a base64 string. And further, we will convert the base64 string image into byte array and save it in mysql database. 

Datatype for MYSQL to save byte array is LONGBLOB.

Example


Properties class

public class UserInfo
{
    [Required]
    public string FirstName { get; set; }

    [Required]
    public string LastName { get; set; }

    [Required]
    [EmailAddress]
    public string Email { get; set; }

    public string UserImage { get; set; }//Base64 string

    public string ImageMimeType { get; set; }
}


API controller

[RoutePrefix("api/Account")]
public class AccountController : ApiController
{
    [HttpGet]
    [Route("SaveUserInfo")]
    [AppAuthorization]
    public IHttpActionResult SaveUserInfo(UserInfo model)
    {
        if (model != null)
        {
            try
            {
                if (ModelState.IsValid)
                {                    
                    var res = _userRepository.InsertUserInfo(model);
                    return Ok(res);
                }
                else
                {
                    return Content<object>(HttpStatusCode.InternalServerError, new { Status = false, Message = "Invalid model." });
                }
            }
            catch (Exception ex)
            {
                return Content<object>(HttpStatusCode.InternalServerError, new { Status = false, Message = ex.Message });
            }
        }
        else
        {
            return Content<object>(HttpStatusCode.InternalServerError, new { Status = false, Message = "Please provide model." });
        }
    }  
}


Business logic class

public class UserRepository : IUserRepository
{
    Dictionary<string, object> _sqlParams;

    public object InsertUserInfo(UserInfo model)
    {
       if (model.UserPic != null && model.UserPic != "")
       {
           _sqlParams = new Dictionary<string, object>();
           _sqlParams["FirstName "] = model.FirstName;
           _sqlParams["LastName "] = model.LastName;
           _sqlParams["Email"] = model.Email;
           _sqlParams["ImageBytes"] = Convert.FromBase64String(model.UserImage);
           _sqlParams["ImageName"] = model.FirstName;
           _sqlParams["MimeType"] = model.PicMimeType;     

          long userId = DBUtility.ExecuteInsertSql(SqlQueryConstants.InsertUserInfo, _sqlParams);

           return new {Status = true, Data = http://www.url.com:8098/UserImage/" + userId };//This url will render image
        }
        else
        {
           return new {Status = false, Message = "Please provide your image." };
        }
     }
}

Now, (http://www.url.com/Images/UserImage/" + userId) user will get this url to render the user image. 
This url basically hits the image controller and userImage action which will read image byte array from database and render image.


Image Controller

[AllowCrossSiteJsonAttribute]
public class ImagesController : Controller
{
   [Route("UserImage/{userId}")]
   public ActionResult UserImage(int userId)
   {
      var user = _userRepository.GetUserInfo(userId);//Get user info
      return new FileContentResult(user.ImageBytes, user.MimeType);          
   }
}


Tuesday, 7 June 2016

MVC Authorization filter

MVC supports 4 types of filter

  • Authorization
  • Action
  • Result
  • Exception

Authorization filter
It is executed after the user is authenticated in MVC life-cycle. It is basically used to authorize user from resources of your application. You can create your own custom authorization filter. A class which extend AuthorisationFilterAttribute class and overrides its OnAuthorization() method is authorization filter.

Example - Suppose you need to access user data from WEB API by providing authorization token. 

Controller
[RoutePrefix("api/Account")]
public class AccountController : ApiController
{
    [HttpGet]
    [Route("GetUserAppProfile")]
    [AppAuthorization]
    public IHttpActionResult GetUserProfile()
    {
        try
        {
            long userId = Convert.ToInt64(Request.Headers.GetValues("UserId").FirstOrDefault());
            var res = _userRepository.GetUserAppProfile(userId);
            return Ok(res);
        }
        catch (Exception ex)
        {
            return Content<object>(HttpStatusCode.InternalServerError, new { Status = false, Message = ex.Message });
        }
    }
}

Custom filer
        public override void OnAuthorization(System.Web.Http.Controllers.HttpActionContext actionContext)
        {
            if (!actionContext.Request.Headers.Contains("AuthToken"))
            {
                actionContext.Response = actionContext.Request.CreateResponse(HttpStatusCode.Unauthorized, new { Status = false, Message = "Token is missing" });
            }
            else
            {
                string authToken = actionContext.Request.Headers.GetValues("AuthToken").FirstOrDefault();

                if (string.IsNullOrEmpty(authToken))

                {
                    actionContext.Response = actionContext.Request.CreateResponse(HttpStatusCode.Unauthorized, new { Status = false, Message = "Token is missing" });
                }
                else
                {
                    long userId = userService.AuthorizeAppUser(authToken);

                    if (userId != null)

                    {
                        actionContext.Request.Headers.Add("UserId", userId.ToString());
                    }
                    else
                    {
                        actionContext.Response = actionContext.Request.CreateResponse(HttpStatusCode.Unauthorized, new { Status = false, Message = "Invalid token" });
                    }
                }               
            }
            base.OnAuthorization(actionContext);
        }//End
    }

Before execution of action method, This custom authorization filter will execute and check for authentication token in header if token doesn't exist. It will straight forward return the status and message. And will not execute the action method.

Saturday, 4 June 2016

C# Classes And Objects

C# classes, It is basically a wrapper or a construct which group together methods, variables or properties. And Object is instance of class. We can create as many instance of class with new keyword. Object has attributes and behavior and these attribute and behavior is defined by a class.

For example : - Suppose you have a TV(Television). It is an object and its size, color is its attributes and its functions like volume up down or number of channels is its behavior. 
Same in case of c# classes and object. Classes instance is an object and its attribute and behaviour is defined by a class.

Class A
{
   int a= 4;
   int b=5;
   int c=0;
   public void Add()
  {
     c= a+b;
  }
   main//Main method
  {
     A instance1 = new A(); //Here can create as many as objects/instance you need
     A instance2 = new A();
  }
}


Saturday, 8 August 2015

How to count repeated characters in an array

using System;

namespace SequenceCount
{
    class Program
    {
        // to count repeated characters in an array
        private void CountRepeatedCharacters()
        {
            string word = "aaabbcccd";
            char[] characters = word.ToCharArray();
            char startingCharacter = characters[0];
            byte count = 1;
            string output = string.Empty;

            for (int i = 1; i < characters.Length; i++)
            {
                if (characters[i] == startingCharacter)
                {
                    count++;
                }

                else
                {
                    output = output + startingCharacter + count.ToString();
                    // set the current character to startingCharacter and set count to 1
                    startingCharacter = characters[i];
                    count = 1;
                }
            }

            output = output + startingCharacter + count.ToString();
            Console.WriteLine("Output will be : " + output);
            Console.ReadLine();
        }

        static void Main(string[] args)
        {
            Program objProgram = new Program();
            objProgram.CountRepeatedCharacters();
        }
    }
}

Sunday, 26 July 2015

How to know that the Page is Post Back or not without using IsPostBack Property

Current Request Type Property is a way to identify current request is post back request or not.

Current context request object have property named RequestType which can be checked to know that is the page posted back to server or not. For example :-

        if (Request.RequestType == "GET") 
         {
            // Call when page loading first time
            // Equal to if (!IsPostBack) property
         }

        if (Request.RequestType == "POST") 
         {
            // Call when page loading second or higher time
            // Equal to if (IsPostBack) property
         }

This is an alternate way of isPostBack mechanism.


GET :- When user requests to a web page by typing the URL in web browser, open a window through JavaScript (window.open ..) or clicking in hyperlink its called Get request or first time request.


POST :- When user requests to a web page by clicking in button (input type submit) or submit a form through JavaScript to the server (form.submit() function in JavaScript) its called Post request or second / higher request.

That’s it!!…..Happy Programming...

Sunday, 7 June 2015

How to create instance of an interface

In this article, i am going to show what is the way to create an instance of a interface. Actually, there is no direct way to create an instance of a interface. This is because they are incomplete (like templates) and creation of an object is completely meaningless here. If we want to do something like that, we must create an instance of class / type that implements that interface. For Example :- ILIST(T) interface provided in System.Collections.Generic namespace showing the below error while i was trying the same.


As i told you before, we must have to use it as a variable which points to a class which implements that interface to workaround this kind of problem. Something like that:-


Here, List(T) is a class which implementing ILIST(T) interface. Please remember that, ILIST(T) and ILIST are not same, the only difference is that first one is generic in type and we can pass any type in place of T. 

That’s it!!…..Happy Programming...


Saturday, 31 January 2015

Why SQL Server allows NULLs for the BIT datatype

During the interview my friend was asked, why SQL Server allows NULLs for the BIT datatype.
I like to explain things with analogies and this is no different. Consider a table holding job applicants details for a Job Board Website. Something Like this:-


CREATE TABLE dbo.tblJobApplicants (
  CandidateID int,
  JobID int,
  DateApplied date,
  isApproved bit
)

-- Applicant is approved
INSERT INTO dbo.tblJobApplicants
  SELECT
    1,
    1,
    GETDATE(),
    1

-- Applicant is rejected
INSERT INTO dbo.tblJobApplicants
  SELECT
    2,
    1,
    GETDATE(),
    0

-- Applicant is in progress means just applied
INSERT INTO dbo.tblJobApplicants
  SELECT
    3,
    1,
    GETDATE(),
    NULL
The key field to note here is of course the BIT field which indicates the approval or disapproval of the applicant. Obviously, when a candidate applies to a job, the status of the applicant isn't known  means the applicant has not been accepted, nor rejected. I think, it is the only end of the application in which this field can make a meaningful value. Hopefully, this example helps explain just when you might require a NULL bit field.

That’s it!!…..Happy Programming...

Saturday, 17 January 2015

How to compare two dates in ASP.NET using JAVASCRIPT

In this article, i am going to show how to validate two dates in asp.net using JavaScript. It also make sure that difference between two dates should not be more than n number of days. In my case, i specified 7 but you can specify it according to your need.

function ValidateDate() {
                var startDate = document.getElementById("<%=txtDatefrom.ClientID%>");
                var endDate = document.getElementById("<%=txtDateTo.ClientID%>");
                //Get 1 day in milliseconds
                var oneDay = 1000 * 60 * 60 * 24;
                
                // to make sure end date is greater than or equal to start date
                if ((Date.parse(startDate.value) > Date.parse(endDate.value))) {
                    $(endDate).css('border', '1px solid red');
                    return false;
                }

                else {
                    // to make sure difference between two dates should not be more than 7 days
                    if (Math.round((Date.parse(endDate.value) - Date.parse(startDate.value)) / oneDay) > 7) {
                        $(endDate).css('border', '1px solid red');
                        return false;
                    }
                    $(endDate).css('border', '1px solid #d3cfc7');
                    return true;
                }
            }

Sunday, 9 November 2014

Validate File format and Size in ASP.NET using JAVASCRIPT

In this article, i am going to show how to valid file type and size of the file upload control in asp.net using JavaScript.


JavaScript Function

  <script type="text/javascript">
        // allowed file formats
        var validFilesType = ["bmp", "gif", "png", "jpg", "jpeg"];
        function ValidateFileTypeWithSize() {
            var fluploadImage = document.getElementById("<%=fluploadImage.ClientID%>");
            var lblMsg = document.getElementById("<%=lblMsg.ClientID%>");
            lblMsg.style.color = "red";
            lblMsg.innerHTML = '';
            var path = fluploadImage.value;
            // to get file extenstion like bmp, gif etc.
            var extension = path.substring(path.lastIndexOf(".") + 1, path.length).toLowerCase();
            var isValidFile = false;
            for (var i = 0; i < validFilesType.length; i++) {
                if (extension == validFilesType[i]) {
                    isValidFile = true;
                    // mention maximum size 
                    if (fluploadImage.files[0].size > 4194304) {
                        fluploadImage.value = ''; // to clear fileuploader content
                        lblMsg.innerHTML = "Each image file can't exceed 4 MB";
                    }
                    break;
                }
            }

            // execute only in case of any file format which was not mentioned in 'validFilesType' variable
            if (!isValidFile) {
                fluploadImage.value = ''; // to clear fileuploader content
                lblMsg.innerHTML = "File Not Valid. Please upload a File with" +
                 " extension:\n\n" + validFilesType.join(", ");
            }
            return isValidFile;
        }
    </script>


Controls

  <asp:FileUpload ID="fluploadImage" onchange="ValidateFileTypeWithSize()" runat="server" />
            <asp:Label ID="lblMsg" runat="server"></asp:Label>
Output


That’s it!!…..Happy Programming...

Saturday, 25 October 2014

Something about Empty String

In this article, i am going to explain meaning of an Empty String in int type column.
create table tblEmptyString (SrNo int null)
insert into tblEmptyString (SrNo) values (1)
insert into tblEmptyString (SrNo) values (2)
insert into tblEmptyString (SrNo) values ('')
insert into tblEmptyString (SrNo) values (null)

select * from tblEmptyString

Output

As we can see, implicit conversion of the empty string to a value of 0 happened here. These Issues sometimes can create problems for us. So from now, we have to care about Empty String more.

That’s it!!…..Happy Programming...

Saturday, 18 October 2014

CSS tooltip on hover

In this article, i am going to show how to apply custom styles on Tooltip.

Aspx Code

   <table style="width: 300px;">
        <tr>
            <td>Username:
            </td>
            <td>
                <a href="#" accesskey="Please enter your username" class="tooltipshow">
                    <input id="txtUsername" type="text" /></a>
            </td>
        </tr>
        <tr>
            <td>Password:
            </td>
            <td>
                <a href="#" accesskey="Please enter your password" class="tooltipshow">
                    <input id="txtPassword" type="text" /></a>
            </td>
        </tr>
        <tr>
            <td></td>
            <td>
                <input id="btnSubmit" type="button" value="Login" />
            </td>
        </tr>
    </table>

 CSS Code

.tooltipshow {
display:inline;
position:relative;
text-decoration:none;
top:0;
left:10px;
}

.tooltipshow:hover:after {
background:rgba(0,0,0,.8);
border-radius:5px;
top:-5px;
color:#fff;
content:attr(accesskey);
left:160px;
position:absolute;
z-index:98;
width:150px;
padding:5px 15px;
}

.tooltipshow:hover:before {
border:solid;
bottom:20px;
content:"";
left:155px;
position:absolute;
z-index:99;
top:3px;
border-color:transparent #000;
border-width:6px 6px 6px 0;
}

In CSS, we have set the content attribute to content: attr(accesskey); this property will display the tooltip by using the accesskey attribute of the anchor tag. Whatever we pass in to the accesskey attribute of the anchor tag it will be displayed as a tooltip. Have something to add to this post? Share it in the comments.
 Output

That’s it!!…..Happy Programming...